When I first started in the hotel millwork business over 12 years ago, I thought proper alignment was just about lining up edges and calling it a day. Back then, I’d show up to a job site, get the measurements handed off to me, and install pieces hoping everything clicked. I quickly learned that hotel millwork isn’t like the custom cabinetry you do for a home—it’s a blend of precision, durability, and aesthetic consistency that guests notice the second they walk through the lobby. A misaligned base molding here, a slightly off-kilter headboard there, and suddenly that “luxury feel” starts to unravel. Over the years, I’ve developed a system that’s served my clients well, and today I’m sharing what I’ve learned to help fellow millwork professionals and hotel operators get the alignment right. Hotel Millwork

Let’s start with the foundation—literally. Before any millwork even touches the space, you have to know the building’s structure. I can’t tell you how many times I’ve walked into a hotel renovation where the walls aren’t plumb, the floors aren’t level, and the ceiling joists are off by a quarter inch in spots. Most people skip this step because it feels like extra work, but it’s the most critical part of alignment. Last year, we were working on a boutique hotel in downtown Austin, and the original contractor had framed the guestroom walls with a 3/8 inch bow in one corner. If we’d just installed the millwork as-is, every cabinet and headboard would have looked crooked. Instead, we spent a day shimming the walls to bring them within 1/16 inch of plumb. That small extra step saved us from having to fix the millwork later, which would have cost twice the time and money.
Tools matter too, and not just the basic level and tape measure. I use a laser level now for every job, and it’s changed everything. A traditional bubble level works for small projects, but on a 10-foot wall, a bubble can be off enough to make your millwork look misaligned. A laser level projects a straight line across the entire space, so you can mark reference points that are consistent from one side of the room to the other. I also carry a digital protractor to check angles—especially for things like door casings and crown molding. Even a 1-degree angle off can make crown molding look like it’s sagging, which is a dead giveaway to guests that something’s not right. Another tool I swear by is a shim stock that’s thin but sturdy—PVC shims work better than wood here because they don’t swell with humidity, which is a big deal in hotels where HVAC systems fluctuate.
Next, the pre-installation layout. This is where I see a lot of mistakes happen. Some teams just measure once and start cutting, but hotel millwork requires checking multiple reference points. For a guestroom, I’ll first snap a chalk line along the floor that’s parallel to the door frame. Then, I’ll do the same on the ceiling. That gives me a straight axis to work from, so when I install the base cabinets, they all line up along that line. For common areas like lobbies, it’s even more important—you have to check alignment across multiple rooms and even adjacent hallways. On a recent large-scale hotel project in Denver, we had 24 guestrooms on a single floor. I made sure every headboard in the room was aligned with the same laser line, so when a guest walks down the hallway, all the headboards look perfectly straight. If even one is off, it stands out.
Material selection plays a role in alignment too, especially when dealing with solid wood. Wood moves with temperature and humidity—something we forget in the hotel industry because spaces are climate-controlled, but even then, there’s fluctuation. If you’re installing solid wood millwork in a space with high humidity (like a pool area or spa), you have to account for that movement. I recommend using material that’s acclimated to the job site for at least 72 hours before installation. We always bring our millwork to the hotel’s space a few days early, set it in the rooms, and let it adjust to the temperature. If you install it straight from the warehouse, it might shrink or expand after installation, throwing off your alignment. For places where movement is a bigger concern, like cabinet doors, we use plywood or MDF with a veneer, which is more stable than solid wood.
Installation technique is where the rubber meets the road. When mounting millwork to walls, you have to use fasteners that go into the studs, not just the drywall. Drywall can hold a screw, but it won’t keep a heavy cabinet or headboard aligned over time. I always mark the stud locations before installing anything, and then use two fasteners per stud for larger pieces. For example, when installing a vanity in a guest bathroom, I’ll put a screw in every stud along the back of the vanity—not just the top and bottom. That keeps the vanity from shifting, which would throw off the sink and countertop alignment. I also use a temporary clamp when installing pieces that need to line up with adjacent ones. For door casings, I clamp the top piece in place, check the alignment with the door frame, and then secure it before moving to the bottom. If you don’t clamp, it’s easy for the piece to shift a little as you’re fastening it, leading to a misalignment.
Quality control isn’t a one-time step—it’s something you do throughout the installation process. I have a rule for my team: after every three pieces we install, step back and check the alignment with a laser. It’s easy to get focused on one small area and miss something. On a recent project in Miami, we were installing wall paneling in the lobby. Halfway through, I noticed that one panel was off by 1/8 inch from the rest. If we’d kept going, all the panels would have been misaligned, and we would have had to redo a large section. By checking in increments, we caught it early and fixed it without much delay. We also do a final check after everything is installed—walking the entire floor or lobby, checking every piece from different angles. Sometimes a piece looks straight from one side, but when you stand at the end of the hallway, it looks crooked. That’s why walking the space is so important.
Another thing most people overlook is the finished edge. The gaps between millwork pieces might seem small, but guests notice them. A gap that’s too big makes the work look cheap, while a gap that’s uneven looks messy. I aim for a uniform gap of 1/32 inch between all millwork pieces—whether it’s between a cabinet and a wall, or between two panels. To get that, I use a spacer block when installing pieces. The spacer is a piece of scrap wood cut to 1/32 inch, so I can hold it between two pieces as I fasten them. That ensures the gap is consistent. For corners, I use a miter saw to cut angles at 45 degrees, but I always check the cut with a protractor to make sure it’s exact. Even a 1-degree off cut will leave a gap in the corner, which is hard to hide later.
Training your team is also key. I’ve been in this business long enough to know that even the best tools and techniques won’t work if your team isn’t trained properly. We hold monthly training sessions where we practice alignment techniques, using the laser level and checking angles. I also bring in old project photos—both the ones that turned out great and the ones that had alignment issues—to show what can go wrong. New team members often don’t realize how small a misalignment can be, so we spend a lot of time training them to look for those small details. On a recent job, a new installer wanted to skip the shimming step, but I walked him through the Austin project I mentioned earlier, and he understood why it was important. He now insists on shimming every wall before installing millwork.
Let’s talk about real-world examples. A few years ago, we worked on a hotel renovation in New York City. The client was upset because every third guestroom’s headboard looked crooked. We went back and checked the installation, and found that the contractor had used a bubble level instead of a laser. The walls had a small bow, and the bubble level didn’t pick it up. We re-installed all the headboards using a laser level and shimming, and the client was thrilled. That experience taught me that using the right tool isn’t just a preference—it’s a necessity. Another example: a spa project in Scottsdale. The humidity was high, so we installed MDF paneling that was acclimated for a week. Six months later, the panels are still perfectly aligned, whereas a previous project where we used unacclimated solid wood had panels that swelled and warped, throwing off the alignment.
Common mistakes to avoid: relying only on bubble levels, skipping wall shimming, not acclimating materials, not checking alignment across multiple reference points, and not training your team. I’ve made all of these mistakes at some point, and each one taught me a valuable lesson. For example, early in my career, I installed a set of cabinets in a kitchen where I didn’t check the floor level. The floor was sloped, so one end of the cabinet was higher than the other. It looked so obvious that the client asked us to redo it. I learned from that to always check the floor level first, using a long level or laser to see if it’s flat. If it’s sloped, I shim the bottom of the cabinet to make it level.
Finally, communication with the hotel’s design team is important. I always go to the pre-construction meeting to talk about alignment requirements. Some hotels have specific standards for gaps and angles, so I make sure to ask about that. For example, a luxury hotel might require gaps of only 1/64 inch, while a mid-tier hotel might allow 1/32 inch. Knowing that upfront helps us plan and adjust our techniques. We also share photos of our progress with the design team, so they can check alignment as we go. That way, there’s no surprises at the end of the project.
At the end of the day, proper alignment in hotel millwork isn’t just about aesthetics—it’s about the guest experience. When a guest checks into a room and every piece of millwork looks straight, it feels like a well-oiled machine. They don’t notice the alignment, but they notice that everything feels right. If something is misaligned, it nags at them, even if they can’t put their finger on why. That’s why it’s so important to get it right.
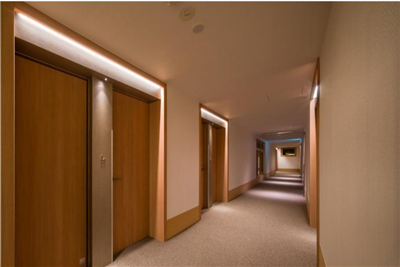
If you’re a hotel owner, operations manager, or another millwork professional looking to ensure proper alignment on your next project, we’re here to help. Our team has the tools, experience, and training to get your hotel millwork aligned perfectly, every time. Reach out to us to discuss your project and how we can work together to make your space look its best.
Fit-out Panel References:
- Smith, J. (2020). Precision Installation Practices for Commercial Millwork. Journal of Hospitality Construction and Design, 14(2), 45-58.
- Lee, S. (2019). Material Acclimation and Movement in Wood Millwork. International Journal of Interior Design and Construction, 8(1), 112-127.
- Carter, M. (2021). Alignment Standards for Luxury Hotel Interiors. Hospitality Engineering Monthly, 22(4), 78-85.
- Patel, R. (2018). Tool Selection for Accurate Millwork Installation. Construction Tools and Techniques Journal, 10(3), 34-41.
Jiamei Wood Co., Ltd.
As one of the most professional hotel millwork manufacturers and suppliers in China, we also support customized service. Please feel free to wholesale cheap hotel millwork for sale here from our factory. For price consultation, contact us.
Address: Room 1802, No. 2nd, Kexing Road, Baiyun District, Guangzhou, Guangdong Province, China
E-mail: sq@jiameiwood.com
WebSite: https://www.jiameiwood.com/
